People have ask me all the time how I use my gelli plate to create printed fabric for my rag quilts and home dec projects here at the studio....
Well, here's how!! It's much easier than you think! Just print like it's paper - except use a fabric paint OR add fabric medium to your acrylic paints as you brayer them on your printing plate. It's not difficult but it does open up a whole lot of possibilities, doesn't it? Every Gelli lover should give this a try.
These are the fabrics that I made on my USTREAM broadcast last week....
I use similar ones in my Rag Quilting class and you may have seen pictures of those fabric sheets posted here on this bog. But I also use these fabrics in my applique projects. It's all great fun!
Enjoy the edited broadcast here and I'll see you live online tonight at 6:30 est! USTREAM LINK
One of my Canadian Scrapbooker team members is spearheading a fundraiser - Hope for Haiti.
Allison Orthner has teamed up with Canadian Scrapbooker Magazine and Live Different to raise money to build an Art/Music Room addition to a school overlooking Cap Haitien in Haiti. I think this is FANTASTIC and would like to support it in any way I can.
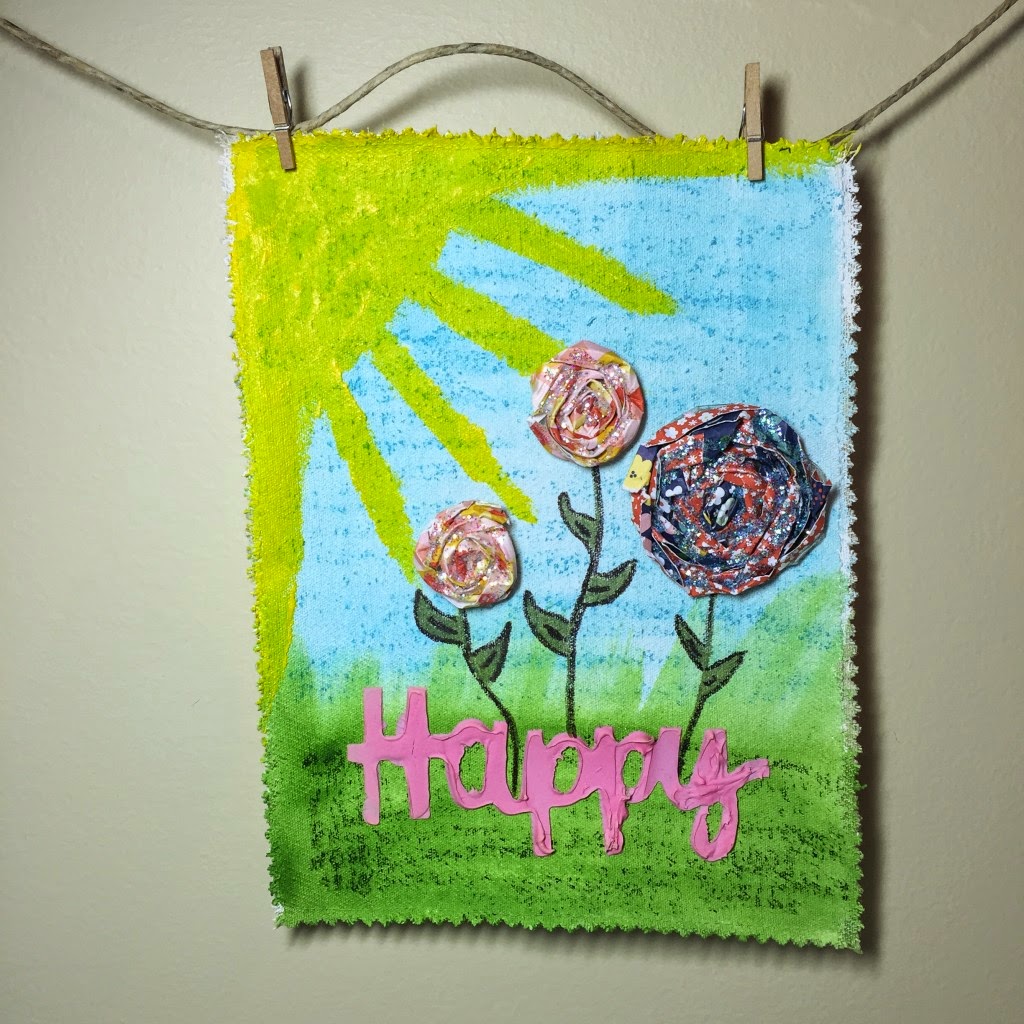
Yesterday's Tuesday with the Team blog post, Kim Gowdy showed us how she created a Banner that will be taken to Haiti to decorate the new Art Room. I am saying WILL be taken because I believe we will raise the funds to make this project happen!! Very FUN banner, Kim! Thank you for sharing that! (read the blog post here)
Photo by Allison Orthner for Live Different
In support, in addition to my donation that I will be making here, I will create a banner too! Be sure to watch my ustream broadcast tomorrow tonight (recorded live at Thursday 6:30 est) to see what I create! Link to my ustream channel
I hope you create one too! And support this fabulous initiative! Much thanks!
I had a lovely day yesterday at Bead FX with some fellow creatives from the CHA Canadian DECP group!! This was the first meeting I have been able to attend (because it was on a Monday - YAY) and they all made me feel so welcome. THANKS GIRLS!!
Not being a beader, I had never been to Bead FX before. Let me just say -- I will certainly be back for a class or two! Not only do they have a VERY LARGE, bright, organized bead and accessory showroom, they also have 3 working classrooms. One for beading, one for metal forging and other metal work and another for lampwork!! Yes, a fully functional and decked out fused glass area. WOW. So impressed. If you like to make jewelry, be sure to drop by their Toronto location!! Thanks for hosting us, Bead FX!
CHA meetings mean fun creative time too! We were treated to 3 different mini classes presented by some of the group members.
Pam from Bead FX showed us how to macrame with wire to create these fun bracelets. A quick yet beautiful project we did in about an hour... I picture our cadets doing something like this on one of our overnights!
Nancy Donaldson, whom some of you know after taking wire jewelry and encaustic painting classes at our Mixed Minded event a couple of years ago, showed us what she has been doing with Soutache. STUNNING! I can see these embellishments (that she is making into jewelry) ending up on an art quilt or two in my future! (not to mention as a pendent or two around my neck - hehe)
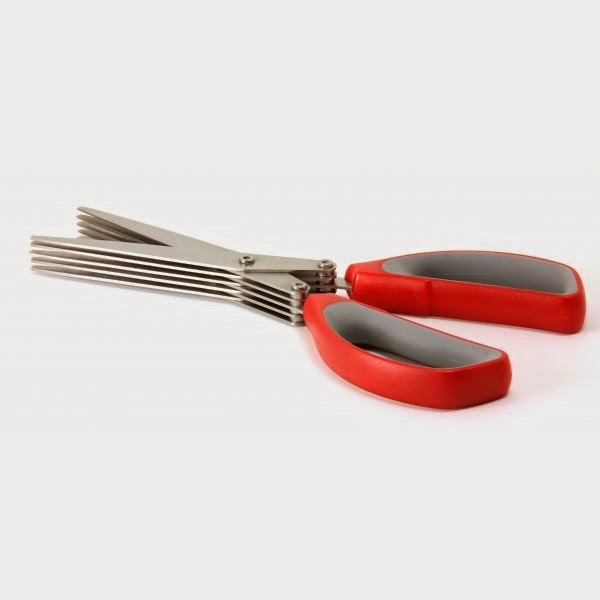
And Elizabeth Glenday, presenting the Westcott Shredder Scissors, had us create some fun paper flower bouquets... Very Cute..
Look for my version of the flower bouquet and these scissors at ScrapFest in Kitchener. They're pretty cool! *wink wink*
Have a creative day! Hope to see you in the studio soon!
This awesome photo was sent to me this week ... love it. It's a photo of Gord taking close up snaps of a painting he worked on at the studio on the weekend.
Love having people in the studio creating, experimenting and enjoying each other.
Thanks for sharing, Gord (and Janet for taking the photo).
Okay, I am really liking the DecoArt Multi Surface Paint!
This paint it formulated to be oven curable on glass and ceramic in the oven... but it also provides a translucent satin finish on paper. Once painted, the paper is flat, writable and had a non-tacky - making it a FABULOUS paint option for art journalers! Coolio!
The paper the I decorated live on our ustream channel was cut up and made into some pretty fun note cards. 3 of those cards were sent to 3 lucky viewers who watched our live broadcastlast Thursday night (happy mail is on it's way, girls!!)
LOVE how they turned out.
Here is the recording of the broadcast. Hope you watch and enjoy.
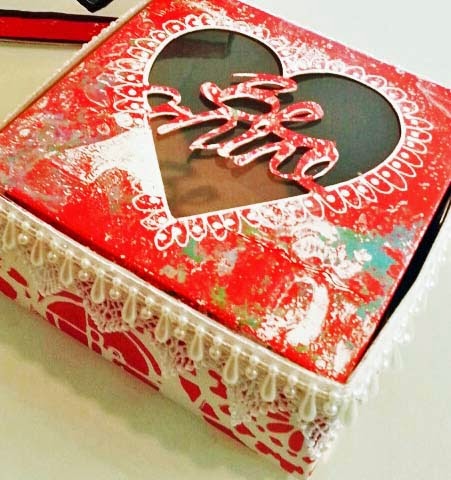
We had a fun broadcast last Thursday evening decorating some Valentine's Boxes that I custom designed with my ScanNCut machine.
At the end of this VERY LONG post... you will find the recording of part of the broadcast where we decorated the cut cake box.
This post goes into great detail on how I created this BE MINE file so you can create something similar on your own. Have a ScanNCut machine and would like the file? Please email me and I'll send it to you for your personal use. Enjoy. And Happy Creating!
Creating a custom BOX TOP file with the Brother ScanNCut
Using a Sharpie, Write your message on a white piece of paper and scan it in the ScanNCut Machine. Be sure to save it to a USB and take it to your computer.
At your computer, log into ScanNCut Canvas (scanncutcanvas.brother.com)
Select NEW and then Click on the Import SVG icon and open your scanned file.
Hand drawn scans often create extra cut lines. Select your image and drag it across the screen to highlight any of these extra lines. Once your image is clear of the extra lines, select and delete them.
Select the Heart from the Basic Pattern menu located on the left side of your screen.
Drag the heart so that is overlaps the sentiment. While the image is selected, right click and Send to Back.
Holding the shift key down, select both the heart and the sentiment. When both are highlighted click on the Remove Overlap button.
Drag, drop and delete the extra lines this process creates.
When finished, select the Project drop down box and then click Download for ScanNCut.
Right click on the Untitled fcm link and Save File As to a USB so you can take it back to the ScanNCut Machine to cut your box top.
From the ScanNCut home menu: Select Pattern, Saved Data, USB, locate the file and then select okay to load it
Select the tools button
Then the resize button
So the image lays the proper way on the box top we'll need to rotate it
Click Left 90 degrees TWICE to flip 180 degrees total. Okay, then Okay two more times to get to the main screen.
Place your unfolded box on a standard mat and load into the machine. Make sure your blade is set correctly - mine was set to 10 but TEST on similar weight card before using to make sure if you wish.
Once the mat is loaded, scan it by pushing the scan icon then the green Start/Play button.
To place your file correctly on the box, drag and drop it using the scanned image as a guide. OKAY
For finer placement... use the move keys if you wish.
Then select Cut and Start
Then you're all set! Assemble the box and have fun decorating!
So happy to have the girls in the studio tonight (Friday) to print their fabric to make rag quilts next week. LOVE how they're turning out... and check out those hands!
The fabric was printed using acrylic paints, fabric medium and the Gelli Plates!
I finished my "Jelly Race" Quilt I sneaked on Facebook. I really love how this turned out! In fact.... I'm writing this blog post curled up on my couch snuggled up in it. :) Makes me happy. I'm thinking I might just have to make a queen size one for the trailer this summer! Smiles, all smiles
Looking forward to a fun day tomorrow working in my Documented Life Journal :) Last Thursday's USTREAM broadcast will be posted soon - complete with ScanNCut tutorial. Have a creative weekend!
The Art House Studio is happy to welcome Susan Gervais to the studio for a Silk Scarf Painting workshop on Saturday February 28 from 1 - 4.
Cost is $45 and includes all supplies!
Susan will guide you in painting Silk with the SoSoft Paints from DecoArt. They come in 48 great colours so I KNOW you'll create something special and unique and have a lot of fun do it too!


_resized.jpg)

