Showing posts with label Melt Art. Show all posts

Saturday, September 29, 2012

"Time flies when you texturize".... USTREAM recap

LOL...  I still can't believe that came out of my mouth while on USTREAM broadcasting live last night.  LOL.  Crazy Crazy!!

I can't tell you how much fun I had simply creating again for the first time in weeks.  I REALLY REALLY REALLY missed it!

I was inspired by a youtube video posted by RachO113  - she totally got my juices flowing again after my creative (moving) hiatus.   My hands are STILL gluey.  *smile*   I am itching to create some more but I have to wait

 This morning I came into the studio to finish the piece.   I built up the left corner with some texture paste and added another cat, a lamp post and some spider embellishments and then went over them all with the silks and layered more UTEE too.   You might notice that I added some gold coloured UTEE to the canvas which, in my opinion, helped make it pop!

I added some words - "There's something strange in the neighbourhood"  (any Ghostbuster's fans out there? *wink*)  I thought it was fitting .... *smile*

Hope you like!   I put it in my front window display.....
Life is GOOD!

For those of you who would like to see how this piece came together,  here is the recorded show from USTREAM last night.  ENJOY
Video streaming by Ustream

Friday, March 30, 2012

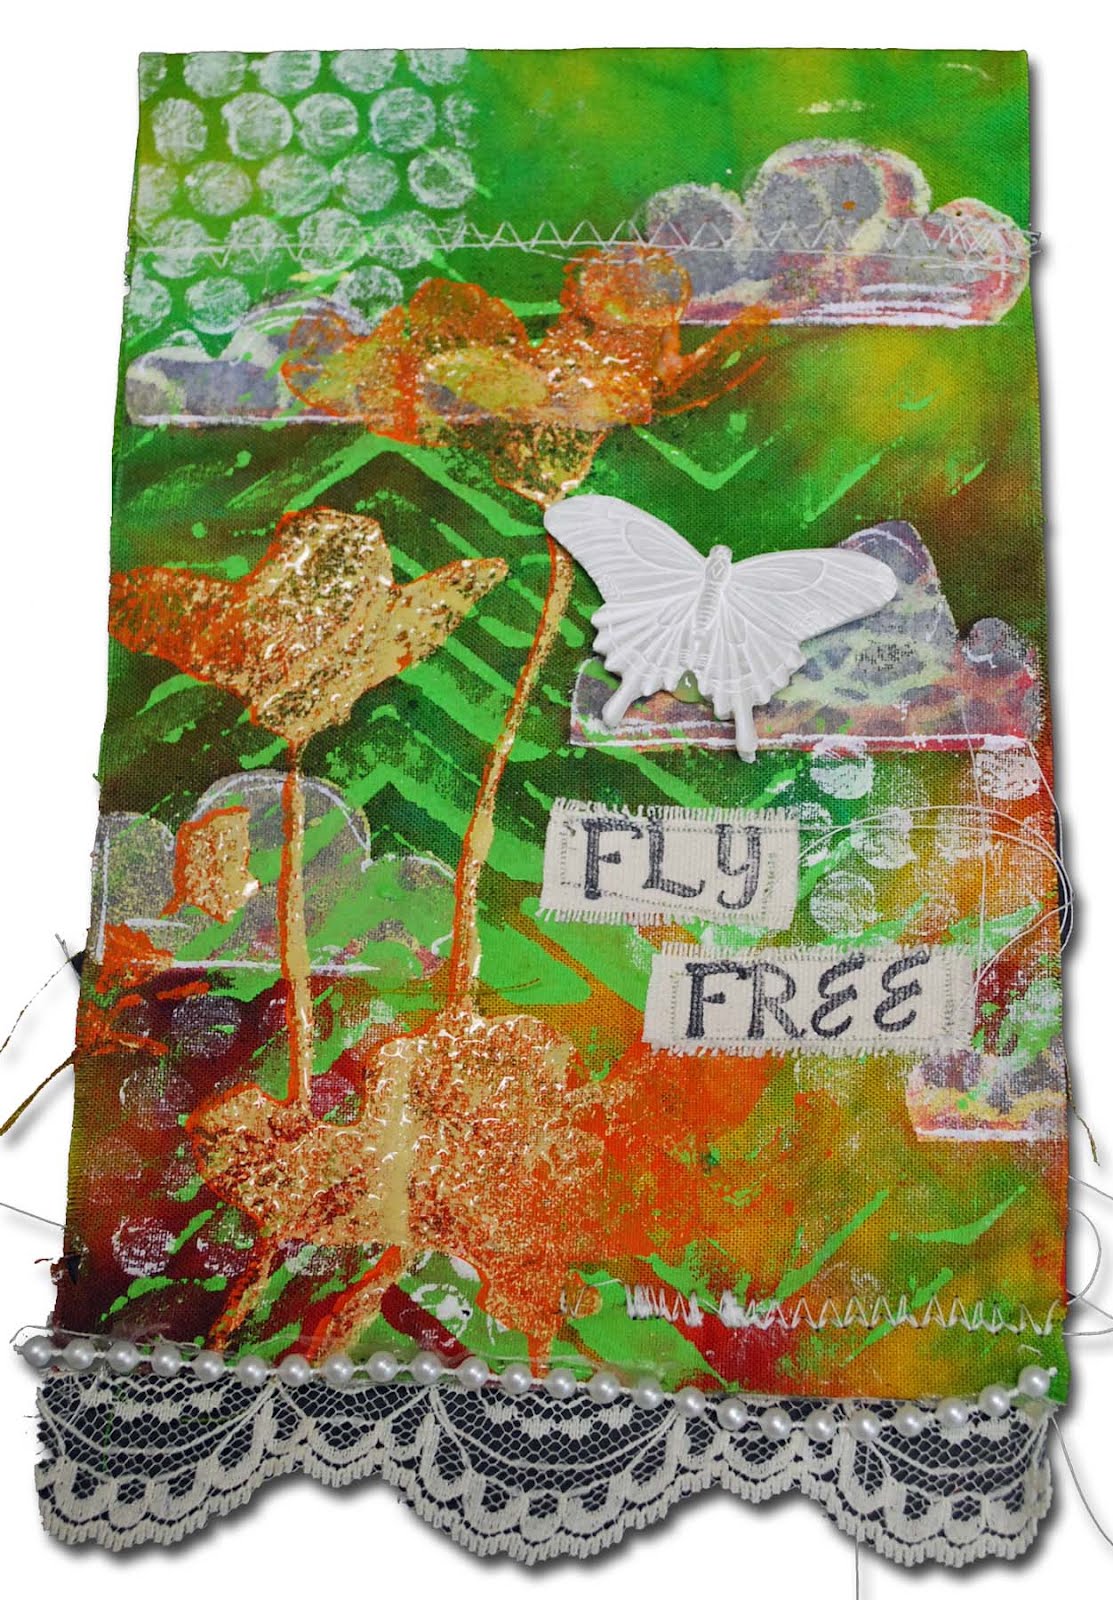
Fly Free - A Prayer Flag a la USTREAM...

I had so much fun broadcasting from the studio this evening with Alyssa Light - one of our instructors at Mixed Minded in May. Alyssa is teaching two classes on Fabric Dyeing (one is a wax free resist dyeing class) and we used some of her hand dyed fabrics as a base for a couple of Prayer Flags that were inspired by an article we saw in the current issue of Cloth Paper Scissors. The top one is my finished flag - below is Alyssa's work in progress....
Thank you to everyone who joined us online tonight! Loved having you a part of the process!! And Alyssa... we wanna see when you're finished!! *wink* Thanks for joining me.
Here is the recorded video


Video streaming by Ustream
Here are the products I used in the video that are available for sale in the studio


Have a creative day everyone!!
...and please note ... next weekend is Easter Weekend - there will be no broadcast on Good Friday. The following weekend (Friday the 13th) is ScrapFest and I will be at that show so there will be no scheduled broadcast there either. I will try to film a live from ScrapFest but that will depend on if there is reliable internet access in the arena. Live Broadcasts will return the following weekend.

Wednesday, December 14, 2011

Love these Canvases

Deanna and Paulette were in the studio yesterday afternoon taking the Ornament Canvas class... and I loved it!! We had so much fun painting and masking and using UTEE. Thanks Girls! Love how they turned out!


(Gotta love Paulette's purples!!)
Thank you for a wonderful day girls!!

Hope you had a creative day too!! And if you'd like to take a class at the studio... let me know. Classes are offered all the time!!

Case in point... there is still room in Manuela's Felting Classes Tomorrow night and next Thursday Night too (both at 7pm) We made two classes for those intersted!! It's going to be fun.
Manuela will be teaching you how to create Phone/Camera Cozies or Mittens from recycled Wool Sweaters. $24 (plus tax) Class runs from 7:00pm to 8:30pm. Let me know if you'd like to join us!
Now, go make something today!!! *Smile*

Friday, October 21, 2011

Christmas? Oh yeah!

It's time to start thinking holiday workshops.
I can't hardly believe it!

Here's a fun 12x16 canvas I created using the Christmas Emporium Collection from Graphic 45, Burnt Sienna Paint by ChromaColour among other fabulous products listed below.
I am adding this to our Workshop Schedule! If you'd like to complete this in time for the holidays, let me know. I'm happy to create a class for you!

Have a creative day everyone!

Products Used/Mentioned:
Golden Fluid Acrylic - Gold


Wednesday, March 09, 2011

Getting Waxy Again...

The best part of my job is that I can switch back and forth between mediums and play. Case in point - from Felting one day to wax another *smile* Truth be told, it was actually completed the other way around but, who's counting right? hehe

While at the Nottawasaga Retreat I had a chance to play -- and play I did!!!
I wanted to try out a couple of products I received in the studio from VIVA DECOR - specifically their Embossing Cream and Inka Gold
You may have seen (and used) Inka Gold in the studio before. It's a fast Drying "metallic" paint that goes on like a polish. It's great to use on anything porous -- I think it gives a satin -like finish. The more you "buff" it, the shinier it becomes. It's very easy to use and apply. I used the red colour and buffed it all over the wood canvas to give this project it's base colour.

Since all of VIVA DECOR's products are water based acrylic.... I new I'd be able to emboss over the Inka Gold
Viva Decor Embossing Cream is easy to stencil and will grow to a 3D shape when heated with a heat-gun. So very cool!! The gold parts of my Geisha Canvas were created with it. I stenciled it over a Crafter's Workshop Template I had in stock.

This was totally fun -- just don't touch it while it's cooling (just after you heat it) -- you might get a finger mark in it. .....don't ask me how I know :)

Next came the wax -- love how it just finished it off! Note: Special thanks to Carmi who sent me some DOVE OF THE EAST papers to make some fun Asian Lanterns and embellies for the retreat... this picture came from that paper set. I just applied to directly to the canvas cause I loved it sooooo much. Hope you like too!

... hummmm, what am I going to play with today? *smile*

Thursday, February 10, 2011

Makin' Custom Ink Pads

We had some inky fun in the studio Tuesday and Wednesday night with the Technique of the Month Club. This month's technique? - Making your own custom ink pads!

I did this technique years ago when I created multiple Christmas Cards -- like say 200 cards in 2005! LOL Perhaps it was the "I'm not making that many Christmas Cards again" but I forgot about this absolutely amazing, time saving technique.

If you followed Tim Holtz's 12 Tags of Christmas this year, Tag #2 used this technique. YAY!! I re-discovered it AND have been enjoying it ever since -- so much so, I needed to show the gals!

Why make your own ink pad? Well, if you are making oodles of cards for an event or an occasion and love the look of multi-coloured stamped images this is the way to go. Cut N Dry Felt is an 8.5x11 version of the felt that Ranger uses in their ink pads. Simply cut to the size of your favourite stamp and stamp (with Archival Ink) on the felt side of the product. Then colour (on the lines) in your favourite coordinating Distress Ink Colours -- like this:

Then align your stamp over your new ink pad and ink it :).... Now you're ready to stamp it out.
Look at the detail you can create with different shades of ink.... and you can get 40 - 50 impressions just like it!!!!!

Now, remember that Distress Ink reacts with water. Want a custom ink pad for your watercolour effects? Do the steps above but before you stamp it, give it a little water spritz with a mini mister.... voila... a gorgeous watercolour image!!

I made one with the new Paperbag Studio Stamps that I just got in the studio! OMG... I am in love with these stamp sheets -- but that's a blog for another day *smile*

I used the HOME Set.... and picked out the image ironically called "Emily" (my daughter's name) (She's the one on the top right). And created some watercolour images of it.... THEN....Got out the beeswax and put together a card featuring the image. -- Yes, a soft, thin beeswax finish. I LOVE THIS CARD!!!!

You must come see it on Saturday during our customer appreciate day!
I guess that's it for now. Thanks for a wonderful TOMC month ladies -- I hope you enjoyed the technique as much as I did. hummmm.... me thinks I need to make a video *smile*
Have a creative day!

Saturday, November 27, 2010

Getting Waxy in the studio


had a fun little wax class in the studio yesterday.

Judy came in and said I wanna do something waxy (like you do) with this photo - HELP! So we played and I know she loved her piece!! ENJOY JUDY!! Thanks for popping by the studio and giving me a chance to create with wax too.
This is what I created. It's a Christmas Gift for my mother so SHHHHHHHHH!!! Don't tell her.
The photo on the canvas is my mom around 5 years old. The Sewing notions are very special to her. They are from my late Nana's own "collection". My Nana spent a lot of time creating outfits for my mother and I know she has many special memories of my Nana creating things for her with these very items. My guess is that she'll like it! ;)

Hope you have a creative weekend!!
Jen will be in the studio today from 11 -4 as I am off to Barrie to see the folks. Drop on by and say hi! AND Don't forget to enter my little Give A Way ... last night's post has details of a little Give A Way I'm doing to celebrate 100 Followers on this blog. THANKS FOR FOLLOWING EVERYONE!!! I'll draw the winner sometime next week. And gosh!! Thank you for all the wonderful things you said about me and the studio. I am truly honoured!! Never in a million years would I have thought you'd write anywhere close to what you all have. I'm truly overwhelmed! Hugs to all! THANK YOU!!!!

Cheers!!

Thursday, November 04, 2010

Technique of the Month Club.....

Got Waxy in an intro to wax technique class....
And it was fun!! I showed the gals how I created my Fall Wax Pieces (My 3 Canvases ...earlier post) and they did a GREAT job. Wax, as a medium, was new to all the girls and just look at their creations (just a few in various states of finish)


THANKS FOR A FUN NIGHT LADIES!!
I'm looking forward to creating these next week in our Technique of the Month Club "Take 2" session next Wednesday.
Hope you all had a creative day!!

Friday, October 22, 2010

1 2 3... New Canvases for me!


YES!! I got creative today. OH My!! I had a few girls come in to play and one, the lovely Leanne, brought a torch to play with. She had told me about a glue burning technique that she tried and thought I'd like. Well.... 4 Canvas pieces later -- hummm... yes... me thinky me likey!~ hehe!! (I did say 4 canvas - one is a gift..... I'll show you when you're in the studio if you'd like)

I went leaf collecting outside the studio to gather enough leaves for my pieces and embedded them into beeswax that I coated the burnt glue with. Some stamping, some postage stamps and a little dusting of Perfect Pearls and zippity doo da... we have some art!! I had so much fun! Thanks for bringing the torch Leanne. I know what I'm purchasing tomorrow morning!!

I also had a couple of people in for classes today too. THANKS GIRLS. LOVE HAVING PEOPLE IN THE STUDIO! You're all so inspiring!

Have a creative weekend everyone!!

Wednesday, February 03, 2010

A little Heart....


Tonight we had the monthly meeting of the DollarStore club.
I love this group of girls.

We missed a couple of ladies this evening but there was lots of eye CANDY to be had - *wink* Candy, get it?? I was a Valentines month project after all. *smile* ...it brings a tear to my eye --Oh wait, that was Sheri! :)

This Heart Canvas is what I made for my project this month. Its base was inspired by a canvas Donna Downey created for her CHA Booth last month. In it she used tags to add texture to the canvas background. I was inspired. I got out my tags that I picked up in the business section of the dollar store and decorated them with reinforcements to create some added texture and then adhered them to my painted canvas (painted with Claudine Hellmuth's Studio Paints).

....and then I painted, and dripped paint and painted some more ... and then went and heated up the wax!! Yippee!!

I covered the entire surface of my canvas with beeswax and then fused it on with my heat gun (I covered it in two layers, fusing between layers) From there I started adding my embellishments: the words, the flourishes, etc and fused them to the canvas with the wax as well.

The next step involved another one of my favourite products: Perfect Pearls. I dusted the canvas with Smoke Blue, Pearl and a metallic Perfect Pearls .. I lurve the effect!

I took the handle from a pot I had collecting dust in the back room, shaped it with brute force (hehe... leave it to me) and then strung some beads on wire to add a little pizzazz.

I like how it turned out... Hope you enjoy :)

Thanks for a great night ladies!!
Can't wait to see what you do with something from the Kids aisle next month!!


Wednesday, January 06, 2010

"Snow" Baby!!

Get out the Inks -- Its Time for the Dollar Store Club!


I showed the ladies how to create "Plaid" with Alcohol Inks and some Glossy paper tonight -- Plaid a la Tim :) ... yes, you saw this technique as part of one of the 12 Tags of Christmas.

The girls had a lot of fun choosing colours and experimenting with the inks -- It's addicting!!

We were a small group tonight -- unfortunately some things came up and some people were unable to join us... but those of us who were there had fun getting inky!!

Take a peek at what a couple of the girls did.....
Barb got "frosty" and Sheri .... well, she got warm AND actually stitched!! YAY Sher!!


I created this Snow Goddess.

I LOVED making this.... I poured melted UTEE into a Clay Mold, let it set and then dusted it with Pearl Perfect Pearls to make her face... Look closely -- I also "iced" the flowers with UTEE. I got this idea from Jennie who, after following a Video Tutorial by Sherry Cheever on Faux Porcelain Flowers, made a post on her blog. She submerged her paper flowers into Melted UTEE to create a "faux porcelain" look. Love it ... and got me thinking -- if you can do it with paper, why can't you do it with fabric? :) Ta Da! Very Cool!

The Goddess herself was inspired by some phenomenal seasonal dolls created by Linda. I knew I'd be creating with my own spin on this ... but this is how I am inspired: A little bit from here, a little bit from there.... That's why I love this little Blog World. You can learn so much!! Thanks for all the inspiration ladies!!

I got beading... there are strands of beads in the "skirt" along with various strands of ribbons and lace, ... and, of course, you gotta love the glass beads that frame her face. hehe.. To create her body I cut a piece of chipboard to fit and then embossed and painted it white. Not sure which part I loved doing more. Gotta make one for each season!


Next Month we Meet February 3 -- It's Valentines Month so.... you guessed it -- the assignment is to create something with HEARTS! Do you wanna join us?? Contact the studio and I'll give you the deets! *wink*
Hey bloggers!!!
Miss me? i just looked at my last post -- JAN 1?? Where did 6 days go?? Wowsers! Sorry Guys.

I have been busy in the studio with retreat prep, classes, end of year (or start of year if that sounds more positive - hehe) and I'm REALLY LOOKING FORWARD to everything on the agenda in 2010.

ASK KAREN returns Tuesday Jan 12. This is your chance to ask me some questions, or to send me some tutorial requests. Email me anytime.... and I promise to post the answers here for you!

The Dollar Store Club meets tonight!
I have had such fun creating my "snow" project. Wanna sneak peek?? Here she is-- my "Snow Goddess" and YES! she has a body -hehe- I will post more tomorrow with the other Dollar Store Club stuff. Off to get ready for the girls!! It's amazing what you can do with Dollar Store items, a piece of chipboard and a little UTEE!

Cheers!

Wednesday, December 30, 2009

An Eagle When She Flies....


I dedicated the song "An Eagle when she flies" by Dolly Parton to my mom at a High School Music Night eons ago and ever since that song has great meaning to my family. When push came to shove, my mother always described herself as being "eagle-like", strong & steadfast -- that through it all she'd come out on top stronger for it. I thought, with everything going on with my dad, that this was a good time to honour her - To let her know she's not alone and her strength had not gone unnoticed.

I sat down at my studio desk with some great ladies today armed with the knowledge that I was going to create a canvas entitled "An Eagle when she flies" -- this is what I came up with.

The canvas backgroung is an Image Transfer -- I transferred some Harmonie Pattern paper that I have here in the studio and totally got one of the ladies excited here... ("Pattern Paper? Really.... ? -- and then she went and tried it too! Yep! Another one hooked :) hehe.... I digress)

I then started layering paints and inks to create dimension. I used some white and metallic gold paint directly on the transfer to make it look a little more polished... and then Distressed inked a Crafters' Workshop Dots Circle template for some added interest and to "ground" the piece. I also stamped a couple of branches in Archival Ink (coffee) ... yep, just kept layering it on.

The next step was to wax the surface. I brushed on a couple of coats of beeswax directly onto the canvas and fused the layers between coats with my heat gun. I imprinted cheesecloth into the wax and rubbed some ink into the crevasses for some added texture. I also fused some pieces of cheesecloth to the piece for even more texture and interest.

The eagle is an image I found on the internet .. I copied it onto cover stock paper and adhered it with wax.... I did the same with the words...

The Heart is a UTEE embellishment I made by melting UTEE in my melting pot and pouring it in a silicone heart mold. Perfect!! Just what it needed. I added some perfect pearls to the heart too -- love how it sticks to the UTEE!! There's always a use for Perfect Pearls!!

The twigs were tied with twine and embedded to the canvas with wax. It's all good!

The "frame" around the eagle (created with Oil Pastel) was a little tricky for me -- I had a hard time getting it the way I wanted it..... I removed my first try and started again-- that's one of the things I LOVE about using wax -- if you don't like it, take it off and start again. I like how it ended up in the end. I think it helps pull the piece together.

I had a great time doing this with the gals here --:)
I hope my mom likes it too -- Who am I kidding? I think I'll need to bring an extra box of kleenex ... with emotions on "high alert" this might be a two box gift! LOL.

Tuesday, November 03, 2009

Ask Karen - UTEE UTEE UTEE


Hello Bloggers!
I hope you had a great Halloween Weekend!! I know I did! :) .... lots of "making memories!"

It's Tuesday and time for our "Ask Karen" segment.

I had a question about UTEE -- "What is it and how do you use it?" Well -- talk about a loaded question!! I'll start by telling you what it is and then I will set you free with a bunch of links to get those creative juices flowing!!

UTEE stands for Ultra Thick Embossing Enamel -- It a thick, granular version of embossing powder that can be melted a couple of ways - in a melting pot, in an oven, or with a heat gun.

Unlike regular fine embossing powder, UTEE does not raise an image -- it coats it. Therefore it is not meant for outlining fine detail. You can pour it into a mold to create your own personalized embellishments, stamp into it to create fun effects, you can crack it for a broken glass look - it's all good.
Enjoy! If you have any specific questions about UTEE let me know.
The studio carries the clear, metallic and brightz powders, super quiet heat guns, melting pots and accessories. I have them all available to use in the studio as well.... come on by for an in house demo or class. I'd love to create one for you if you would like to learn more.